Your cart is currently empty!
Using BitBrowser with PROXY.father Mobile Proxies: A Simple Step-by-Step Guide

Why Choose BitBrowser?
BitBrowser, an advanced antidetect browser, simplifies multi-account management with enhanced security. Paired with PROXY.father’s fast 4G/5G LTE German Mobile Proxies, it ensures a private browsing experience and optimal performance. This guide will show you how to set up BitBrowser with PROXY.father for secure and efficient browsing.
Configuring BitBrowser with PROXY.father
1. Sign Up with BitBrowser: Go to the official BitBrowser website and register by providing your email or phone number. You’ll receive a confirmation code to verify your account.

2. Download BitBrowser: After verifying your account, visit the “Download” section on the BitBrowser homepage. Select the version compatible with your device’s operating system and proceed with the installation.

3. Open BitBrowser: Once the installation is complete, launch BitBrowser and log in with your credentials.

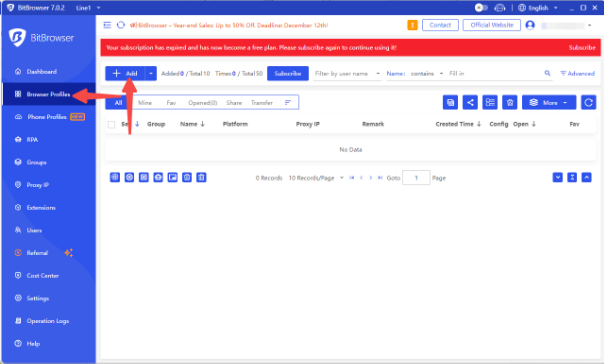
4. Launch BitBrowser: Open BitBrowser, click on the browser window on the right side, and then click on Create Window.
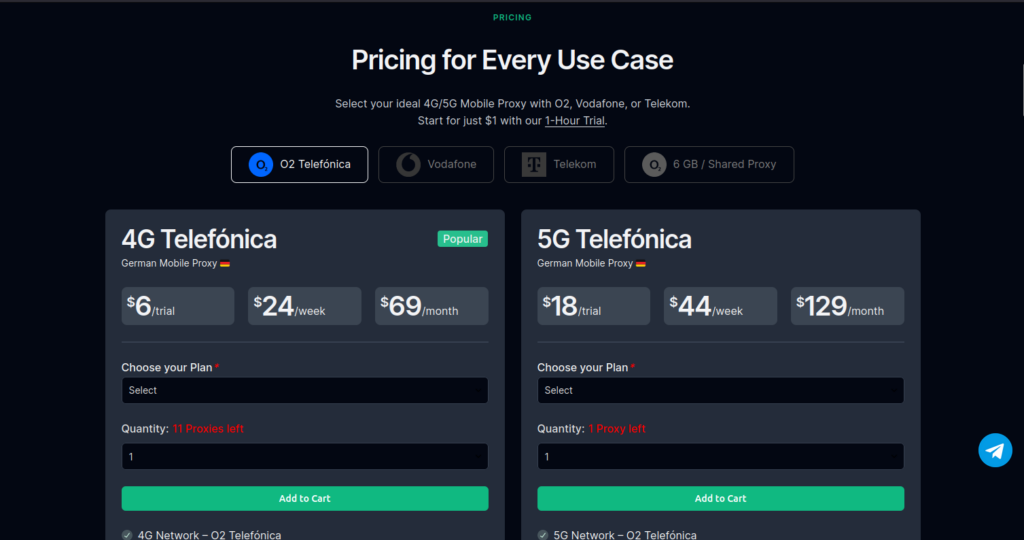
5. Getting Your Proxy: Visit www.proxyfather.com/#pricing to explore our different proxy plans. Choose from providers like O2, Vodafone, or Telekom, and select 4G/5G devices with various time periods tailored to your needs. Once you’ve selected your proxy, add it to your cart and complete the purchase. For assistance contact us on Telegram at @proxy_father. After receiving your proxy, return to BitBrowser to finish the setup.
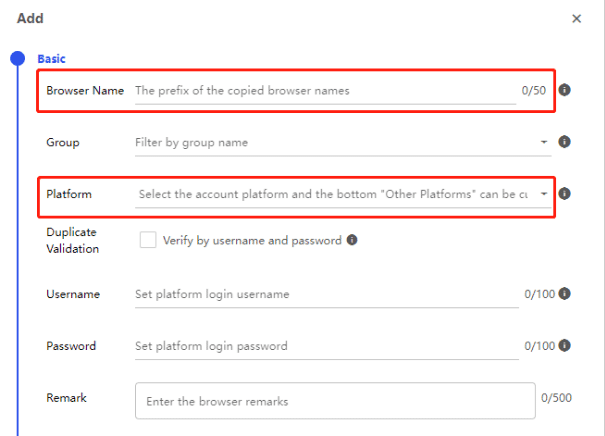
6. Choose Your Account Platform: In BitBrowser, select the account platform from the available options and enter the necessary details to complete the proxy setup.
7. Configure Proxy Settings: After entering the details, scroll down to the Proxy Settings section and choose HTTP or SOCKS5 as the proxy type.
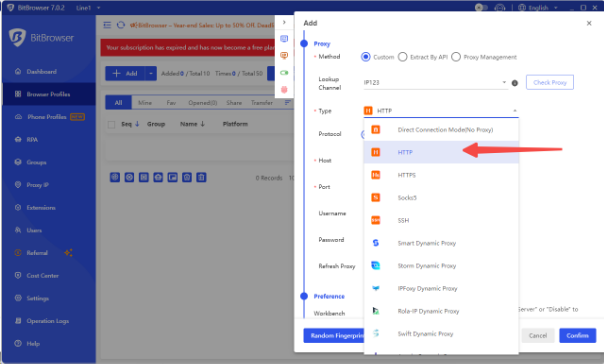
8. Enter Proxy Details: Next, enter the proxy host (IP address), proxy port, username, and proxy password provided by PROXY.father via email after your purchase, then click “Proxy Test.”
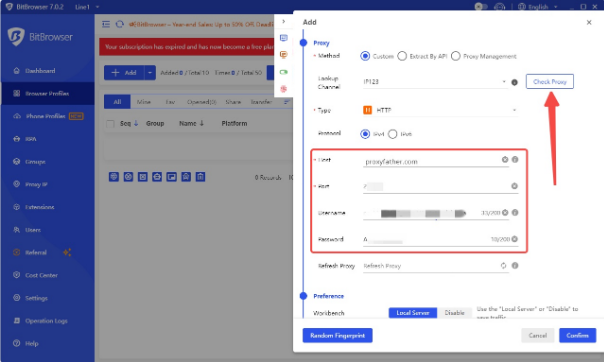
9. Complete Proxy Configuration: Once the generated proxy IP address information appears on the right, the configuration is successful. Finally, click “Confirm” to save the proxy settings and enjoy your private internet experience.
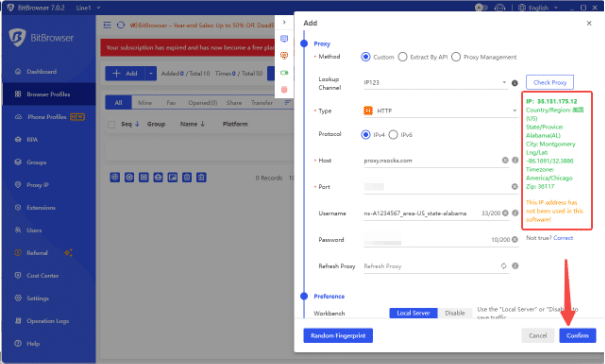
And that’s it!
Your BitBrowser is now set up with a mobile proxy from PROXY.father. For any BitBrowser-related questions, contact support via email or on Telegram at BitBrowser Telegram. For inquiries about PROXY.father mobile proxies, reach us via email or on Telegram at PROXY.father Telegram.
Conclusion
BitBrowser is essential for securely managing multiple accounts, whether for web scraping, e-commerce, or social media management. By isolating each profile, it protects your online activity. To maximize its potential, pairing it with the right proxy is crucial.
PROXY.father provides fast, reliable 5G Mobile Proxies that secure your identity and data, ensuring high-speed connectivity and maximum privacy. With a variety of plans available, every user can find the ideal solution.
Start your journey with BitBrowser and PROXY.father today, and experience unparalleled internet freedom.